I decided to give this one its own page, since it’s part amp, part effects and actually becomes a complete rig in its own right. If you want to go deep into this rig, don’t miss the article on how I set the modeller up for live gigs. This article, though, is about the main bits and the cases used to transport it around.
To the right, you’ll see the rig set up at a gig. The pedalboard/MIDI controller in front, with the rack and monitor to the left. That’s the whole rig! No backline amp pointing at the audience (taking their heads off) or worse; at the sound engineer, causing the guitar to be mixed too low in the PA.
I do have to make a tiny bit more room for myself in front of my playing position, compared to a regular pedalboard/amp rig. But that is usually not a problem, since there’s no amp behind me taking up space.
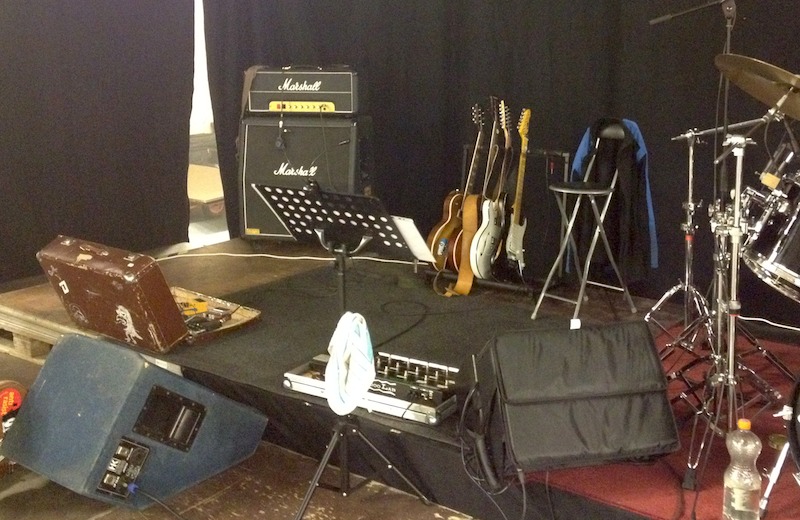
The other shot shows the setup from the front. Where the amp would normally go, I was able to keep a guitar stand – this particular gig required both 6-string (I carried two strats, one as a spare), 12-string and baritone guitars – and a barstool for the slower bits. The Marshall/suitcase pedalboard setup belongs to the 2nd guitarist at the gig – it was plenty loud, but my rig kept up with it nicely 🙂
Main rack

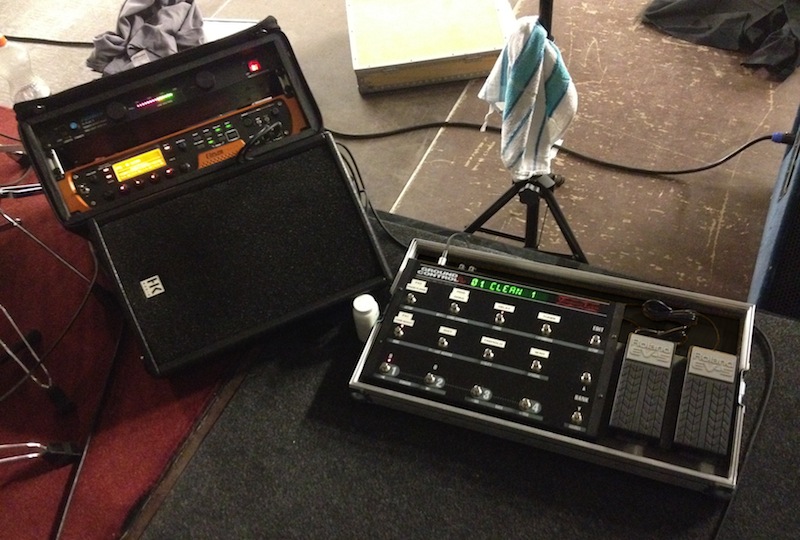
The core of my digital rig is a 4 space rack, which houses a Furman PL-Plus E power conditioner and an Avid/Digidesign Eleven Rack. Having been a long time firm believer in ”real” tube amps over modellers, I took the 11R home to try. Over the years, I have tried several modellers (mostly in the Line 6 form), and even though the sound has sometimes been there, they have never felt right. Turning the guitar volume down didn’t make the ”amp” react the way I’m used to, and pedals run in front of the modeller definitely didn’t sound the same as they did in front of the real thing. Suffice to say, I hadn’t given modellers much thought. Until the 11R, that is…
I played it through a small full-range PA system, and after a bit of twiddling (tip: skip the dreadful factory presets, and just try the raw amp/cab/mike sounds) my jaw dropped. It responds to volume knob changes just like the real thing, and it generally feels much like playing through a real amp. It only took me a few minutes to set up four basic rigs for the sounds I tend to use the most. Then I started playing with the on-board effects – the selection isn’t huge by any stretch of the word, but perfectly adequate for my needs. And with the added expression pedal controls, it pretty much covers all the ground I need it to.
I’ve also purchased and installed the Expansion Pack, which brought a bunch of new amps, cabs and effects. If you have one of the early 11R’s, where it didn’t come pre-installed, I highly recommend getting the EXP!
The 11R also functions as an audio interface for ProTools, complete with a mike preamp for the times you want to mike a real amp (or sing, or record an acoustic, or…), but that’s a whole article in itself. I’m using this one both as a live rig as well as for recording. As mentioned, it lives in a Rockbag 4 space rackbag, together with a Furman PL-Plus E power conditioner that I’ve had for over 20 years now. And while the Furman doesn’t regulate the voltage, it does completely stop any nasty pops caused by refrigerators/fluorescent lights/AC units turning on/off. Why 4 spaces, you might ask? Well, one should always leave a little room for expansion 🙂
Pedalboard/MIDI controllers
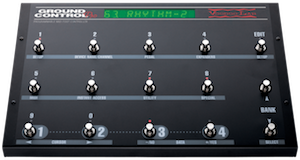
When I need more control, I use a Voodoo Lab Ground Control Pro with two Roland EV-5 expression controller pedals. The pedalboard is set up to provide 4 presets per bank, with 8 Instant Access switches. This way, I don’t have to make up presets for everything (basic clean, clean with tremolo, clean with chorus, clean with… you get the drift :)). Instead, I select a complete rig that has all those effects available, and choose in real time which ones I want to turn on or off.
The MIDI jacks in both the 11R and the Ground Control Pro does seem quite fragile – they are soldered straight to the circuit board, with not much in the way of real support. While that may be fine for studio/home use (especially if you rarely unplug the cables), for live gigs it does feel a little too flimsy. People accidentally stepping on cables sticking out of pedals and the constant plugging/unplugging can wreak havoc with delicate jacks like these. I knew I wanted something more sturdy, so I decided to replace the MIDI plugs on the cable for Neutrik XLR connectors with breakout boxes at both ends.
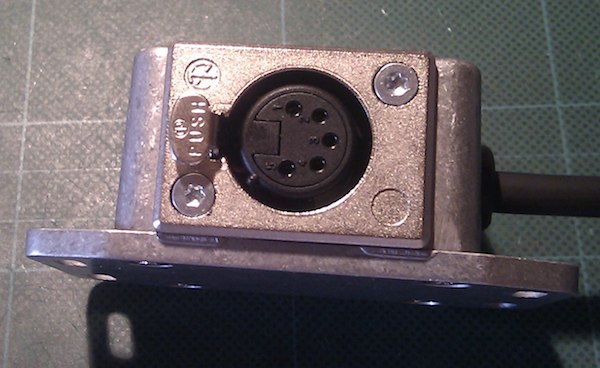
Back in the rack, there’s a box (pictured) that connects to the MIDI in jack in the 11R. That box also has a jack where the power supply for the Ground Control Pro connects to, so the MIDI cable can carry power to the pedalboard*. I have a similar box intended for the pedalboard end, but haven’t installed it yet. Anyway, this system feels far more rugged than constantly plugging/unplugging the MIDI jacks. If something were to take a hit, it’ll be easily replaced stuff like the breakout boxes or MIDI cable, rather than the MIDI jack in the 11R or pedalboard.
* One important thing about phantom powering the MIDI controller – the Voodoo Lab unit can use both a 5-pin connection, with power on the bottom two pins, or a 7-pin connection (again with power on the bottom two pins). Most other MIDI controllers that can be phantom powered need a 7-pin connector exclusively, while other may not be able to do this at all, so check the manual thouroughly before trying to send power through the MIDI cable.
Powered monitor
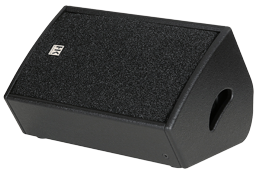
Obviously, when playing live or rehearsing, the rig needs to be amplified. I am currently running a HK Audio Premium PR:O 10XA as my main stage monitor. I chose to go with a 10″ woofer mostly because of size/weight considerations, and going for a powered speaker meant I wouldn’t have to fit (and carry) a separate power amplifier in the rack. The PA system is fed from the XLR outputs in the back of the 11R, while my monitor gets its feed from the ”Output to Amp” 1/4″ jack on the front of the unit. I have the 11R set up so the front panel volume control only affects the 1/4″ outputs, which means I can set my stage volume independently of the PA feed, without having to mess about with the gain control in the back of the speaker.
The general idea with using a full-range (often referred to as a ”FRFR”) PA speaker as the monitor is to provide a sound that is as close to the FOH sound as possible. That way, when I tweak presets I have a good idea how they will sound out front. And I get to hear the same sound as the audience, which is a first for someone who is used to playing miked amps 🙂 Of course, you could just have the sound engineer add the guitar to the main monitor mix, but I don’t feel comfortable relying on someone else to make sure I hear myself. If I need a little more or less, I want to just be able to adjust the stage volume myself. Also, I’m still old-fashioned enough to want to hear my guitar from a dedicated monitor, rather than just as a part of the monitor mix (with vocals, keyboards etc also in the mix).
Now, there are other monitors/powered PA speakers out there of course. I hear good things about the QSC K series speakers, as well as RCF ART series and of course EV (the ZX1 is awesome for its size). And with the digital processors in some of them, they can sound really nice. But one of the things that drew me to the HK Audio speaker was that it doesn’t have any processing to make it sound nice (and which would of course add to the overall latency of the system) – it’s just a raw PA speaker with an old-fashioned power amp, in a box made of real wood (ok, MDF, but you get the drift). While there might be other stuff out there that sounds more nice and neat, this one is the most ”PA” sounding I’ve tried so far. Again, I don’t want my monitor to fool me into tweaking my presets to a point where the FOH sound gets compromised.
Complete rig, packed up and ready to go…

I bought a set of transport cases for the whole rig, both for protection and for ease of transport. To begin with, I figured I wouldn’t be flying or letting anyone stack them at the bottom of the pile in the back of the truck, so for the first try I went for lighter semi-soft style Rockbag stuff. However, the old saying ”buy cheap, buy twice” still holds true… The pic to the right shows what I eventually ended up with.
The main rack is – as mentioned earlier – an RB24410B ”shallow” 4HE rack bag. It has a frame (basically a box) made from 9mm plywood, with a soft-ish shell around it. It has handles on the side, so you can carry it in one hand. Or you could, if you were a bit longer than me. At my height, holding the handles with my arm straight down my side doesn’t lift the rackbag enough… Thus, in the pic below, the handles have been removed, awaiting fitment of a regular amp-style handle. 🙂
The MIDI controller and expression pedals live in a custom made pedalboard/flightcase I ordered from Flightcase Warehouse in the UK. I found I needed to raise the pedals up a little to provide better access for my feet (all my fault – I realize I could have specified thicker foam for the bottom to do that job), so I cut some 7mm plywood to fit. The plywood sheet was then covered in velcro carpet, both to help secure the gear, but also to make things look nice.
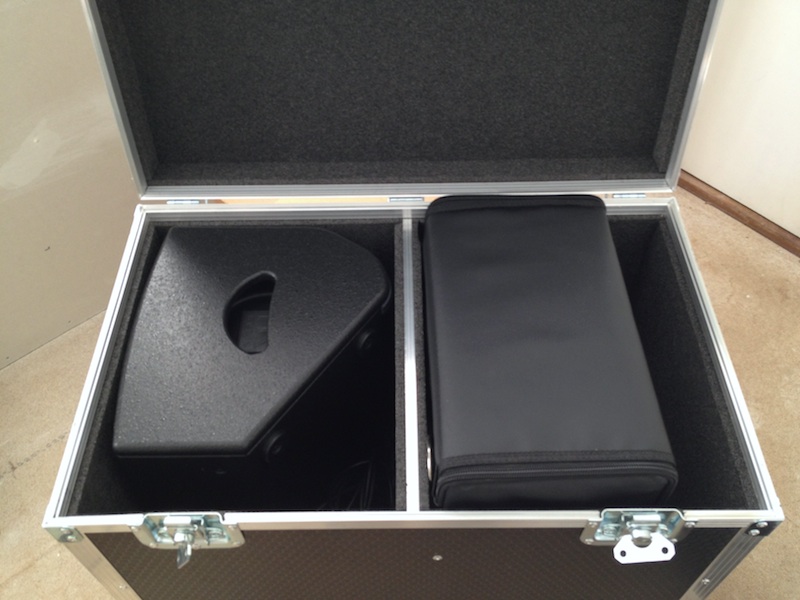
The HK Audio monitor is transported together with the rack in a custom ordered hinged lid trunk, again from Flightcase Warehouse, a manufacturer I can wholly recommend! I had the trunk made from 7mm plywood rather than the usual 9mm, to save weight. The whole rig can be wheeled in as just two separate units (with the pedalboard on top of the flightcase). I can also bring only the rack case, for studio sessions or when I want to use the Eleven Rack for bass (assuming the venue offers good enough monitoring).
As you can see, I left a little extra space in the compartment that houses the rack bag. I did it partly to make the case width similar to that of the pedalboard (I’m a neat-freak that way…), and partly to make room for various items I might want to bring (guitar stand, sheet music, cables etc).